|
|
38-9 Restoration |
|
| Home The Beginning Don't Plug it In |
 |
|
|
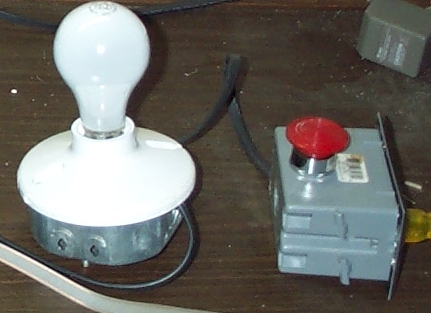
I followed Stenning's suggestion before applying power (see his guide, pages 4, 5, and 8). Lacking a variable transformer, I used the "100 Watt Bulb" method of limiting power.
With the 100W in the circuit, I applied power. The lamp had a very faint glow. All of the tubes glowed. A spot check at the output of the rectifier tube showed around 275VDC, so the transformer and rectifier tube in the power supply section looked reasonable. Despite having replaced the main caps, the unit was silent. Even after a couple of minutes, with volume at max, there was no sound at all. Tuning, and switching between should have produced some static, but it didn't. Looks like there's trouble in the Audio Amplifier section. |
|
Copyright © 2004 look4000@verizon.net
|